
Virtually Speaking
I've got multiple, diverse interests and it's always great when different interests have some connections. Just like everyone else, I found myself having to adapt to life through the lens of a webcam. In my public speaking, work and my volunteering in Scouting I found a common theme that presenting and demoing things over video is very different to doing so in person, and there was much room to do this better.
So, I decided to think about the bits I didn't like and ponder if there was a better solution already out there.
Aside from getting the basics right, more on this later, there were some particular things that annoyed me about public speaking virtually.
Video conferencing software is great, but it's usually designed for meetings, where it's more of a peer to peer arrangement than a presenter (that would be me) and an audience. Teams Live, and Facebook live, which we use in Scouting is closer to that model, but most virtual talks are run as meetings.
My first gripe was although in video conferencing software you can share your screen, and have your camera feed appear in the gallery of attendees, I'd like to have far more control over the process and be able to control the video I send out to the world. In some streaming services such as Facebook live you can either share the screen or your camera, but not flip between both, which is even more limiting. It turns out that this is a solved problem, and gamers have been doing this for years when they stream games on services like Twitch.
My next annoyance, is that when I flip from PowerPoint to demo I do so quite clumsily. Ideally, I'd like to be able to seamlessly do this, and the same applies to physical meetings as well. Again, it turns out to be a solved problem, and a little bit of effort with achieving mastery of virtual desktops will go a long way here.
My final rather esoteric annoyance is sometimes you'd like to show how to do something that's not on screen. My particular use cases were tying knots, showing how easy authentication was with a Yubikey USB hardware key and showing how Azure Information Protection worked (which did exactly what it was supposed to and made it impossible to show on a screen share). A wide range of things, but fortunatly not at the same time or for the same audience. Once again, there's a solution for that by setting up a multiple cameras, and changing which camera you output to your meeting software or stream.
Before we get down to the technical and playing with the hardware toys, it's probably taking the time to fix the basics. Even if you are not going to go down the road of advanced production techniques, getting the simple stuff right is so important.
Getting the simple stuff right
Camera, lights action
I bought a Logitech c930e web camera for my home office early in 2020. Since then market forces have done insane things to the prices of decent web cameras. The reason for this is that laptop cameras are not flattering. The small size mean the picture quality is often poor regardless of the resolution in pixels. Not only that but the camera angle looking from below the chin just isn't flattering to most, nor is a view of your ceiling light fixtures. Better cameras will produce a good picture even in less than ideal lighting conditions, as often you will find in a home setting. Once you have got yourself setup with a camera in a better location, the next thing is to think carefully about what is also on camera behind you. Ideally this should reflect the imagine you wish to project, and be part of your personal branding, without being too distracting. Politicians expend huge efforts ensuring the podiums they speak from have nothing negative behind them, and it's something you should think about to. Generally unless you are lucky enough to have some empty space behind you, overbearing items around your head are distracting to your viewers. How much of the view is you versus how much is background is a matter of personal taste, but unless you are fortunate enough to have film star qualities a really close in image of a face is generally uncomfortable for most people to view.
Joe Wicks became a household name over lockdown with his "PE With Joe" YouTube exercise classes, and he did a brilliant job of broadcasting from what was recognisably a normal living room, but with carefully curated items placed in it. Be like Joe. Try hard to not look like you tried too hard.
Modern video conferencing software has fancy video processing to blur or replace the background. It does an amazing job under the circumstances, but there's always some leakage at the edges. If you wear glasses or headphones, or have frizzy hair the software gets confused about what is and isn't you and weird effects abound. I like to play the game of trying to guess what the room behind looks like from the brief glimpses you get whilst the software is struggling to detect the edges. I personally think it's a distraction, so unless you really have no better option, sorting out your background usually looks better. You can of course go to the additional effort of a green screen, but keeping your background tidy is probably less effort.
If you have more than one screen, place the camera over the screen you will be looking at most during the presentation. This makes it more likely you will be looking towards the camera. Looking off camera repeatedly when talking makes it look like you are not making eye contact with your audience, suggesting you are deceiving them.
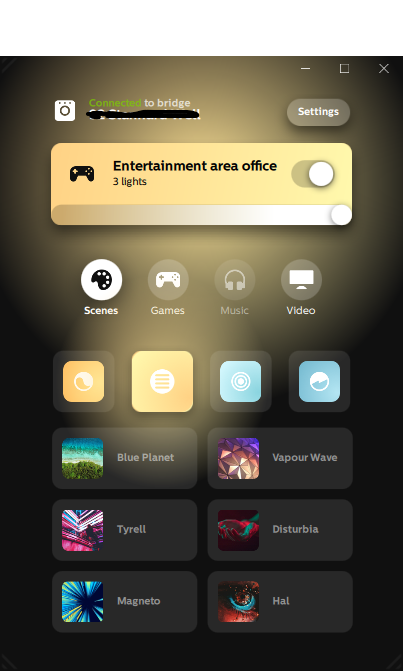
Once you are happy with the camera angle, then consider the lighting. You can buy specially made video lighting kits, but as I actually wanted to do work in my home office as well, I decided against this. As we already had Hue lighting in the house, I did however buy some additional Hue lights and put these either side of my monitors. By using the Hue Sync app on my PC, as well as my phone I could easily bring in plenty of light when I needed to without making my office feel like a studio the rest of the time. Bear in mind natural lighting from windows changes through out the day and bright sunlight streaming into a room is pleasant but not always helpful for video.
As always, taking the time to experiment and perfect this will result in a better experience.
Voices
Let's be blunt here. Your laptop microphone is a terrible way to be heard. It's not far from the fan (which may end up running hard as video is CPU intensive), and the keyboard which you'll probably be using in a demo, so big two sources of unwanted noise are closer than your mouth. There's only so far fancy digital signal processing can help you.
Modern Bluetooth headphones often have microphones and the quality is very good. Some even have boom microphones which work even better. For wearing all day in meetings they are an excellent choice in terms of comfort and audio quality. However, if you look at what people who record audio for a living use, it's nearly always a discrete microphone on a boom. The quality is noticeably better, and the directional nature of these means if they are placed correctly they will pickup your voice, and not the hum of a CPU fan, the click of the keyboard or the neighbourhood dog population. And if your voice is clearer, it's easier to understand and just much less work for people to listen to.
With a boom you can place the mic in the optimal place to pick up your voice and fold it away when you don't need it. There's a certain period of adjustment to getting used to something quite so close to your face, and you may need to play around with placement if you don't want the mic to show in your camera, but the reward is vastly better audio.
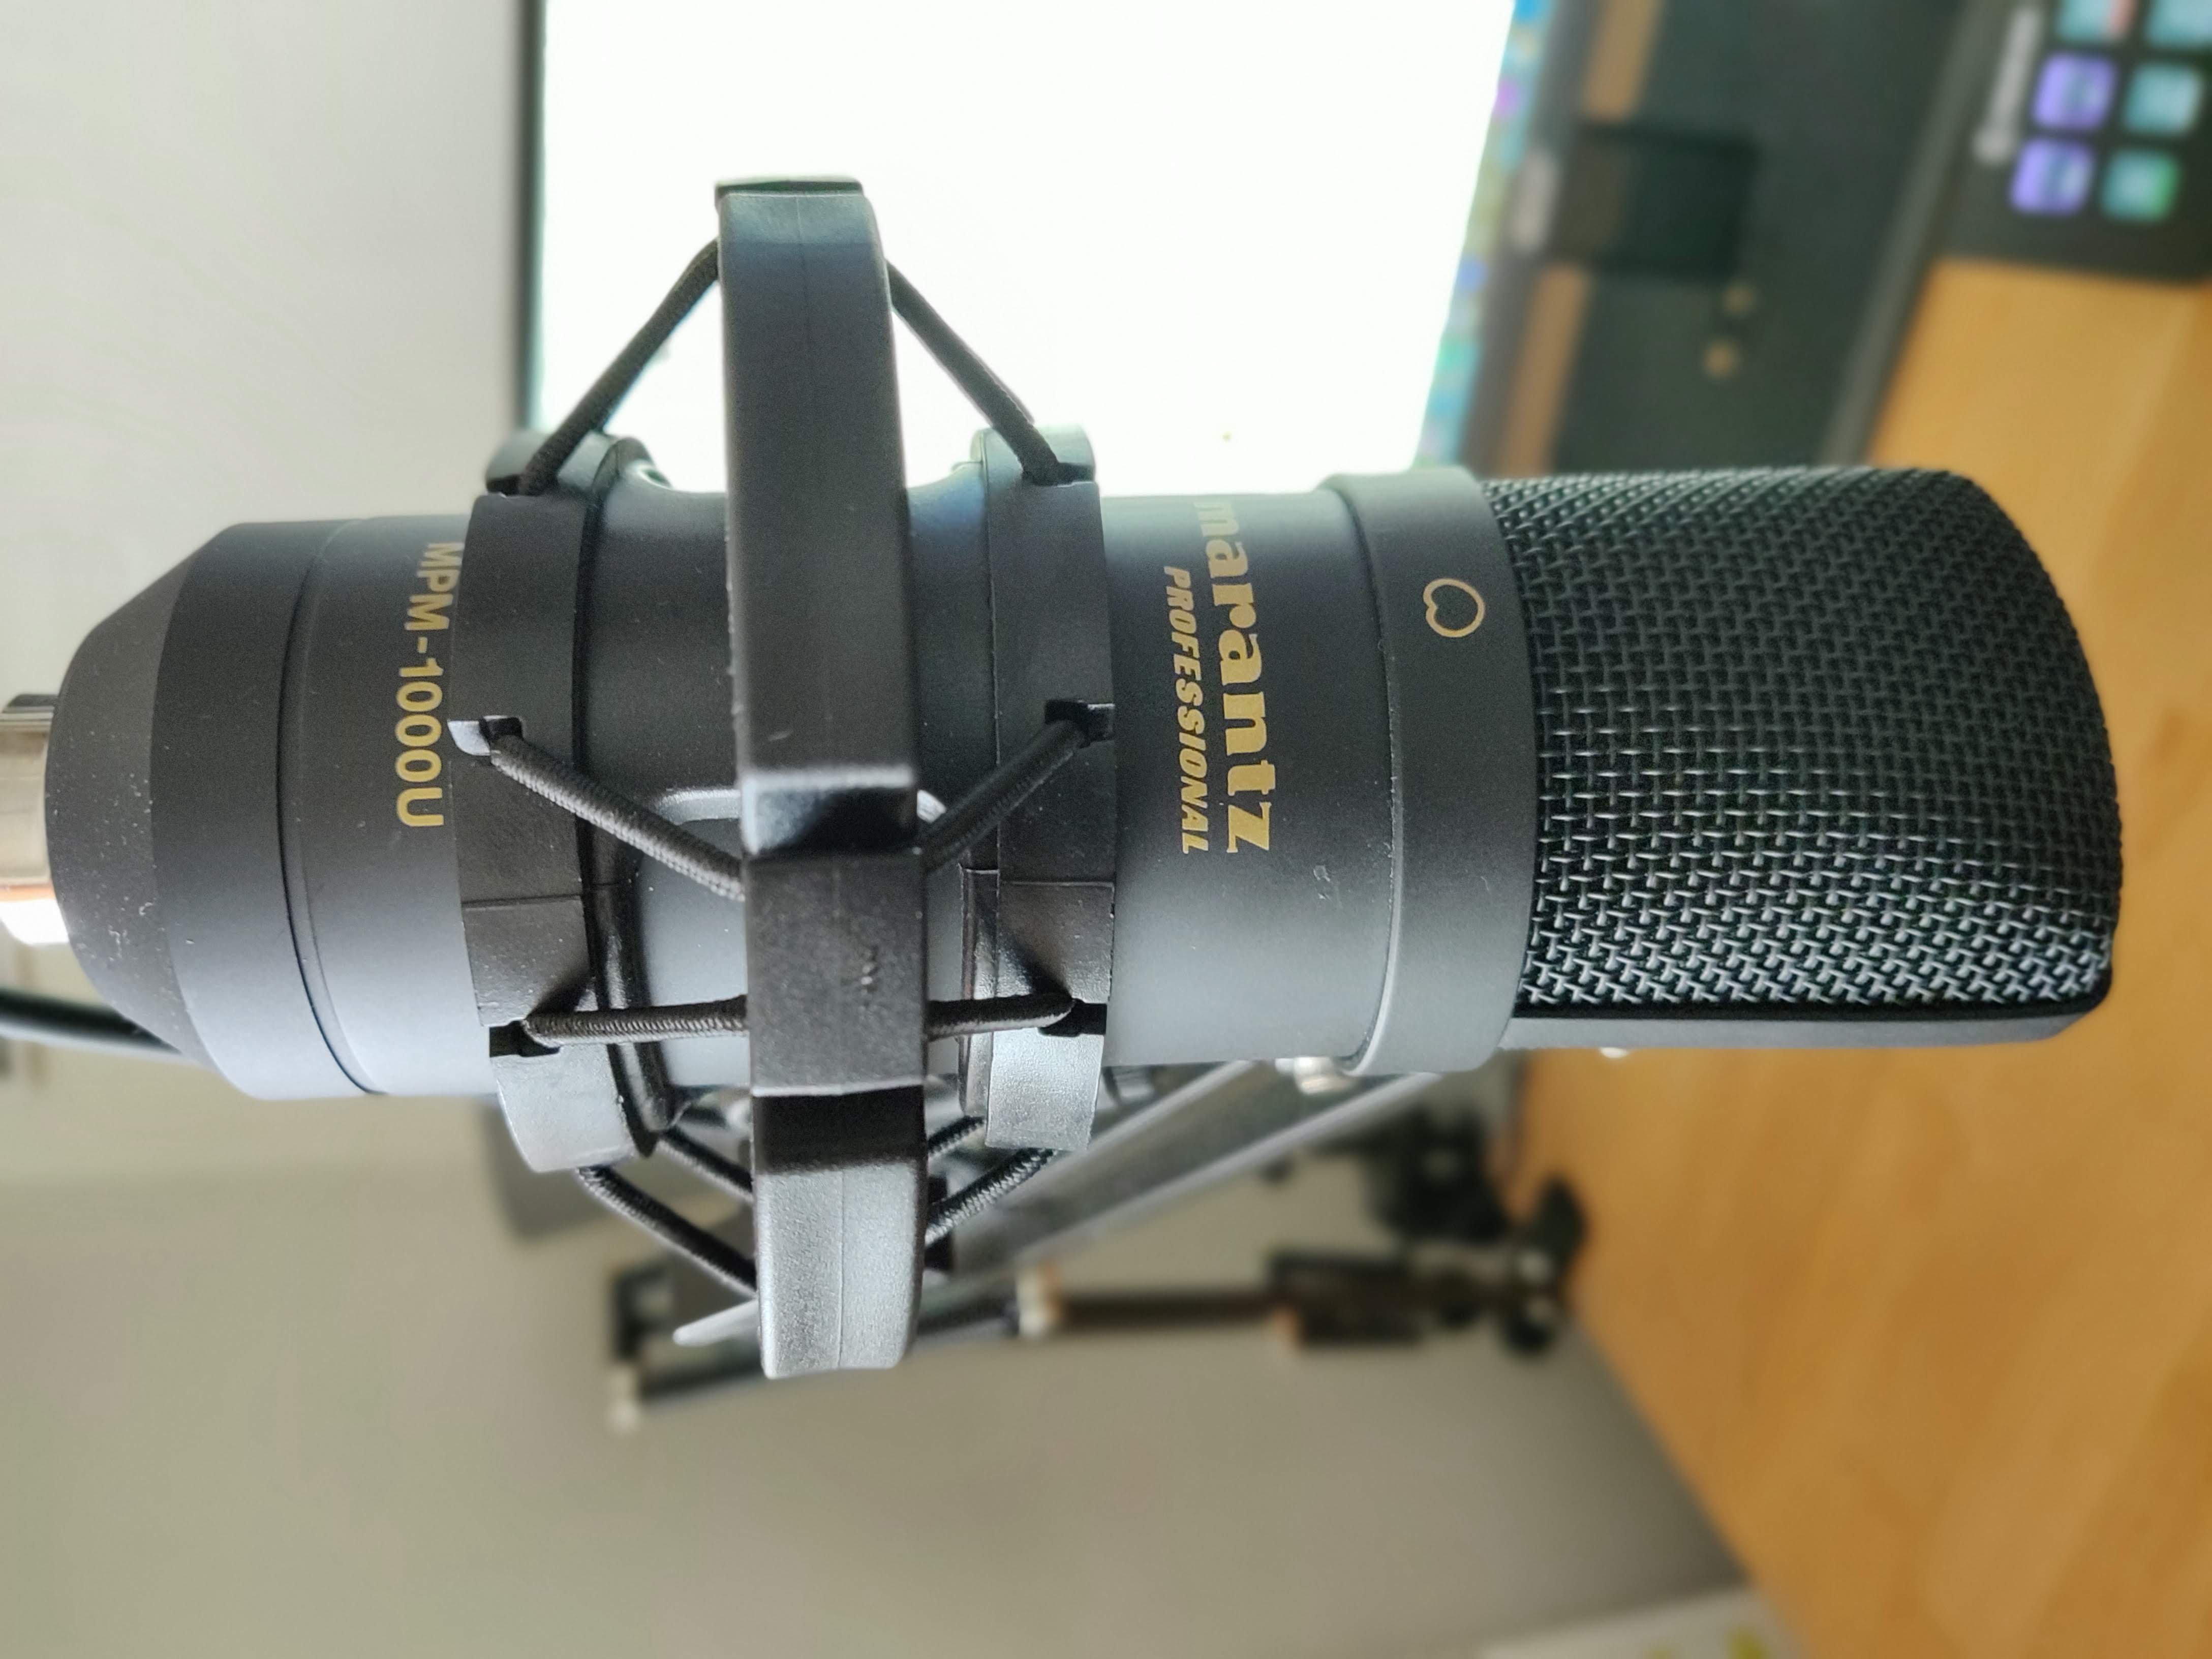
There's a certain amount of adjustment needed to get the right placement for the microphone, so there's a lot of value of any time spent adjusting things. You may decide to go to town on this and get a pop filter if you are prone to spitting at the microphone, and a shock mount if you are prone to bashing the mount. My own experience was that a cheap mount and an expensive microphone seemed to do the job.
It's kind of obvious, but background noise which you normally not aware of is really noticeable when you are recording. Anything from neighbourhood dogs to delivery drivers will inevitably happen when you least expect it. A quality microphone will have a directional pattern which will go some way to remove noise from anything but in front of you, but don't expect it to miraculously mask out background noise. Those of you, myself included who have mechanical keyboards may wish to plug in a quieter keyboard during recording, as the sound of mechanical keys is jarring to your audience.
Interuptions
Aside from the obvious interruptions from the real world that we’ve all grown accustomed to, and have limited control over, it’s worth considering interruptions from your own computer. Hopefully windows update will not decide that a reboot is required halfway through your presentation, but most computers have a bunch of software that can generate notifications. It’s worth making sure you use Windows focus assist to mute notifications as far as possible. If you have two screens, sharing the screen that is not you primary screen should ensure that your audience doesn’t see notifications even if you forget to set focus assistant correctly.
Putting it together
Now you have the basic hardware sorted, it's time to consider the human factors. When you are sharing the room with an audience, it's so much easier to read the room, and adapt your content dynamically depending on how the audience react to your presentation. Without this, it's probably safer to slow down the pace a little from what you would use face to face. Bad audio, unseen distractions and so many other things including the cognitive load of virtual conversation tend to slow down the rate at which people can absorb information. If your audience has already spent part of the work day on video calls, the chances are they are already tired and easily distracted.
Improving your presentation
Mastering virtual desktops
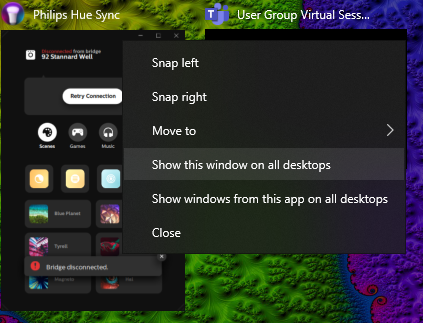
Virtual Desktops have been around for a while, and they are built into modern operating systems such as Windows 10. I must not be the only person to fail to use them much, as with dual monitors I didn't need any extra screen space. However, I was missing a trick. When sharing a screen, I frequently want to go between PowerPoint and a browser when I want to demo something. I'm usually pretty clumsy at this. However, I have found if I get PowerPoint to display full screen in the screen I'm sharing, and set up different virtual desktops for each other features I'm showing, for example one virtual desktop with a browser logged in with a certain account, another with a browser running a different account, a command line etc, I can use a keyboard short cut to switch between the desktops without breaking stride. In Windows 10, from the task view, you can assign applications to each desktop, and there in lies the hidden gem of being able to right click on applications and pin them to show on all desktops. I tend to do this with the Teams window, and the video software (more on this later), so they stay on the other screen to the one I'm sharing.
Better yet, the same techniques will work when presenting in person. If you are fortunate enough to have a Logitech Spotlight, you can use the software to flip between virtual desktops, so you can do this without even touching the keyboard.
A better video feed
Video conferencing software such as Teams and Zoom has the ability to share a window or a screen, and separately include a feed from a camera. This is fine for a meeting, when the aim is for peers to collaborate, but a presentation or conference session is more akin to a broadcast. I'm involved in volunteering in Scouting, and just like everyone else from March onwards we had to suddenly adapt to doing everything virtually. We decided to use Facebook Live, as we already used a private Facebook group to manage our group. The feature that sent me searching for a better solution in the first place was that Facebook Live allowed either a camera or a document to be shared but it was impossible to switch between them in one live session. It then occurred to me that I'd actually like far more control of the video I was broadcasting in other places, for example during demos and public speaking, as this had all gone virtual. My aspiration was to be able to show either a my screen containing PowerPoint slide or browser, with a small video feed of myself in the corner, or a full size video feed, and be able to easily flip between them as I saw fit.
It turns out that gamers have been doing something similar for a long time, as streaming games to large audiences is a big enough market for Amazon to spend close to a billion dollars on Twitch. There was a large selection of software available for doing this. Some software was heavily tailored to game streaming and some was more general purpose.
Open Broadcast System, or OBS for short seemed to be the best option for my use cases. Although the software is very powerful, it's not particularly obivious what to do.
Looking for a change of scene
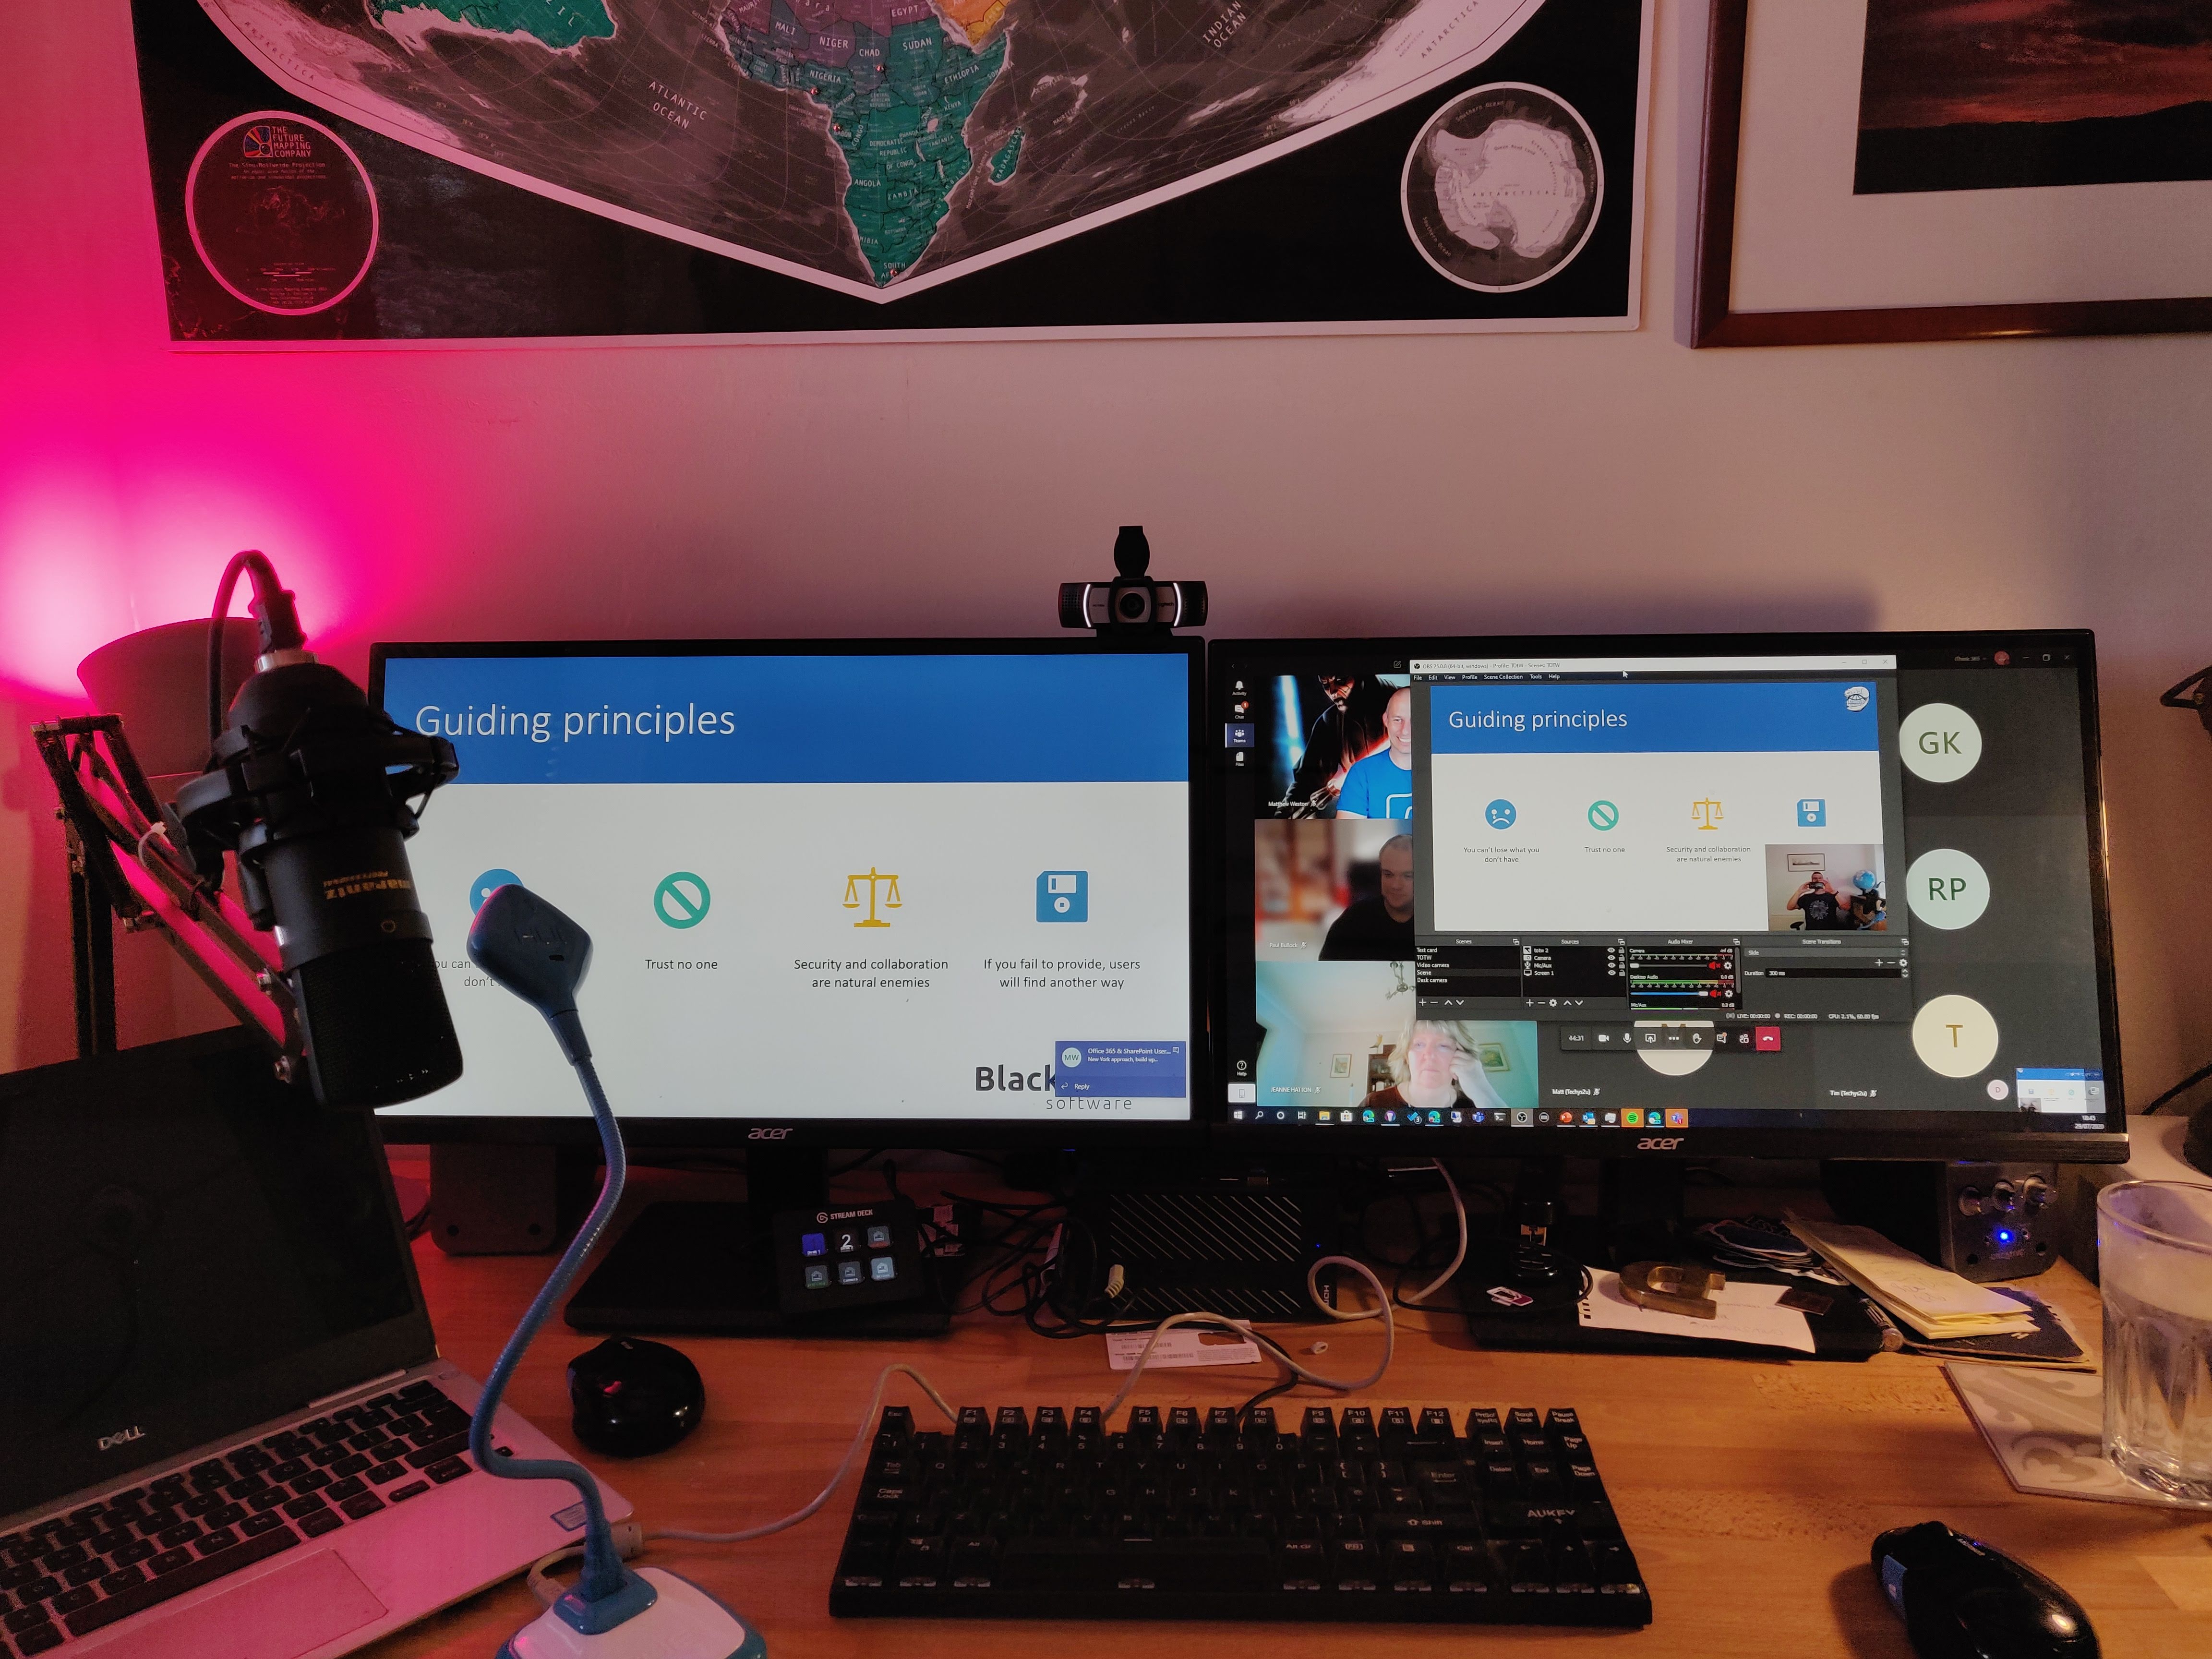
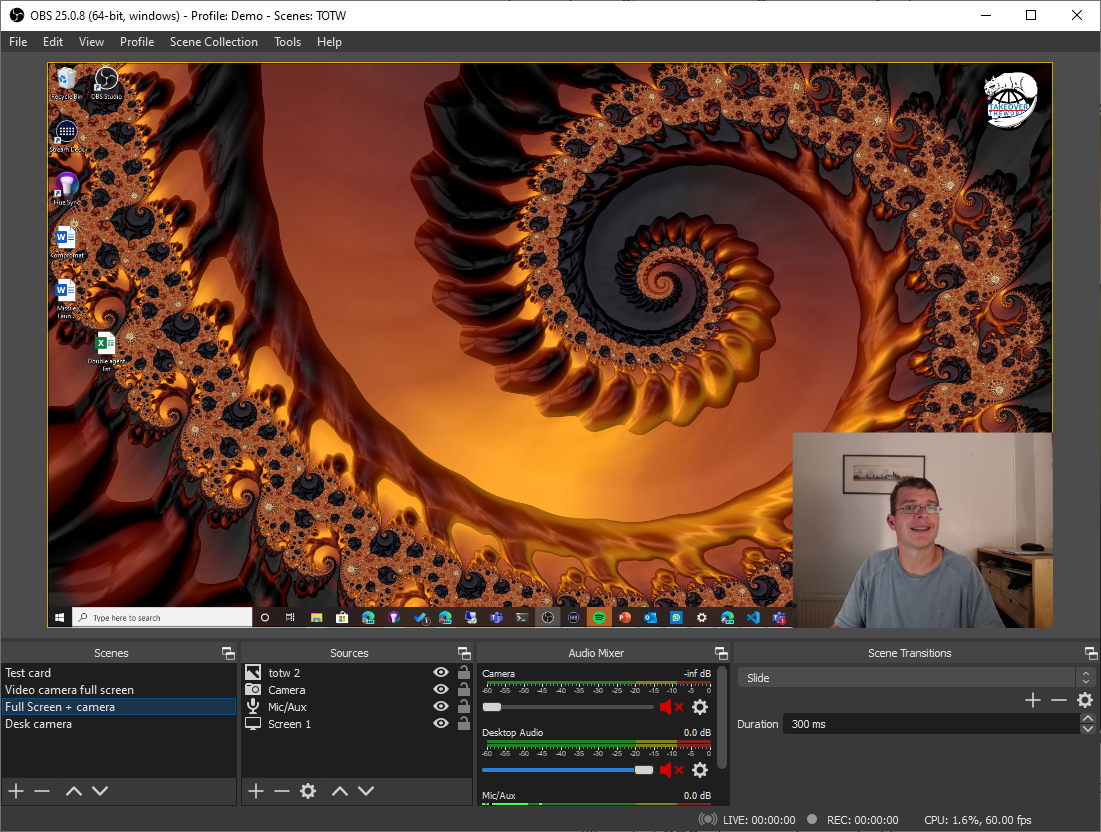
I realised the key concept was to build a series of scenes, and each of these would have some combination of inputs which could be combined together in OBS. My initial goal of being able to have a full screen camera, and easily change to PowerPoint with a small camera feed was actually easily achieved by creating two different scenes and adding a screen as a video source to one, and then adding my camera feed to the same scene and resizing and positioning the window to occupy the bottom right. I could then add the video feed for the camera to the second scene and make this occupy the entire feed in OBS.
I could then simply use OBS to switch scenes during the presentation as I wanted.
Emboldened by this I immediately set about adding more scenes and getting all the toys out of the box to see what it could do, before settling on something more practical that I could work with during a talk when my concentration was mostly focused on the actual talk.
There's a number of things I found really help make the most out of OBS:
- Two scenes is a good starting point. One with full screen camera and one with small video overlaid on top of a shared screen.
- You can add a 'test card' scene with no video and use this before you are ready to broadcast as a placeholder until you are ready.
- Virtual desktops work really well, but remember to pin OBS so that it appears on all desktops (on the screen you are not sharing) if you have a multiscreen setup so you can still control OBS when you change desktop.
- Although OBS allows you to mix audio as well as video, if you are outputting your video to conference via a virtual camera (more on this later), this will make no difference.
- You can add text and even widgets to each scene, which is a great way to add some branding to your video. Just because you can, doesn't mean you should, and be wary of trying to emulate a 24 rolling news channel with graphics and text exploding all over the screen as it distracts from the content.
Being a Teams player
OBS by default outputs video as a stream. This is pretty easy to use as a source with broadcast orientated setups, as with most of the common solutions including Facebook live and Teams live events use a stream key you can plugin to OBS, but when you want to inject video from OBS into a regular Teams meeting, or indeed any other software which expects a camera, you will need an extra bit of software which converts the output from OBS into a virtual camera. Fortunately it's a really simple process of downloading OBS Virtual Cam and setting this as your "camera" in your meeting software.
Update 2nd September 2020: As of OBS Studio 26, in the Windows version OBS has an virtual camera built in removing the need to add this.
Avoiding cognitive overload
In a professional TV broadcast there is the role of the producer and the presenter. The producer is responsible for controlling the presentation, and the presenter is responsible for presenting the content. Most of us doing public speaking don't have this luxury, so you have deal with both the medium and the message. Ideally, we should be free to concentrate on the message without getting too distracted by the medium. But, now I have hopefully convinced you of the advantages of taking more interest in controlling the medium, how do you actually manage all of this? People are terrible at multitasking, but there are tricks you can do to help manage your presentation.
With two or more screens I will set one screen up as my presentation, and the other screen as my production screen, and ensure all the stuff needed for the demo will open on the presentation screen, and keep everything needed for the production (video conferencing software, OBS, notes, timers. lighting etc) on the other. This helps me remember where to look for things. The snag with this, is that to change scenes in OBS requires you to mouse out of the presentation screen and find OBS, which is a distraction. Even with keyboard shortcuts, you need to then ensure OBS has focus. Applications like AutoHotKey allow the creation of quite complex behaviours from keyboard shortcuts, but remembering the right combination is yet more cognitive load, i.e. something else to get wrong.
Game streamers have this exact same problem, and playing a game and talking requires even more concentration. One of the ways they solve this problem is with an external USB device called a Stream Deck that offers a bunch of customisable actions from customisable buttons. The device comes in 3 sizes with 6, 20 or 32 buttons. More buttons cost more and makes the device bigger. The accompanying software lets you set up actions for each of the button, and a custom icon and text for each button that is shown on a LCD panel behind the buttons. Illuminated labelled buttons are so much easier to find that keyboard shortcuts. And the shortcuts can be quite deeply integrated with commonly used applications.
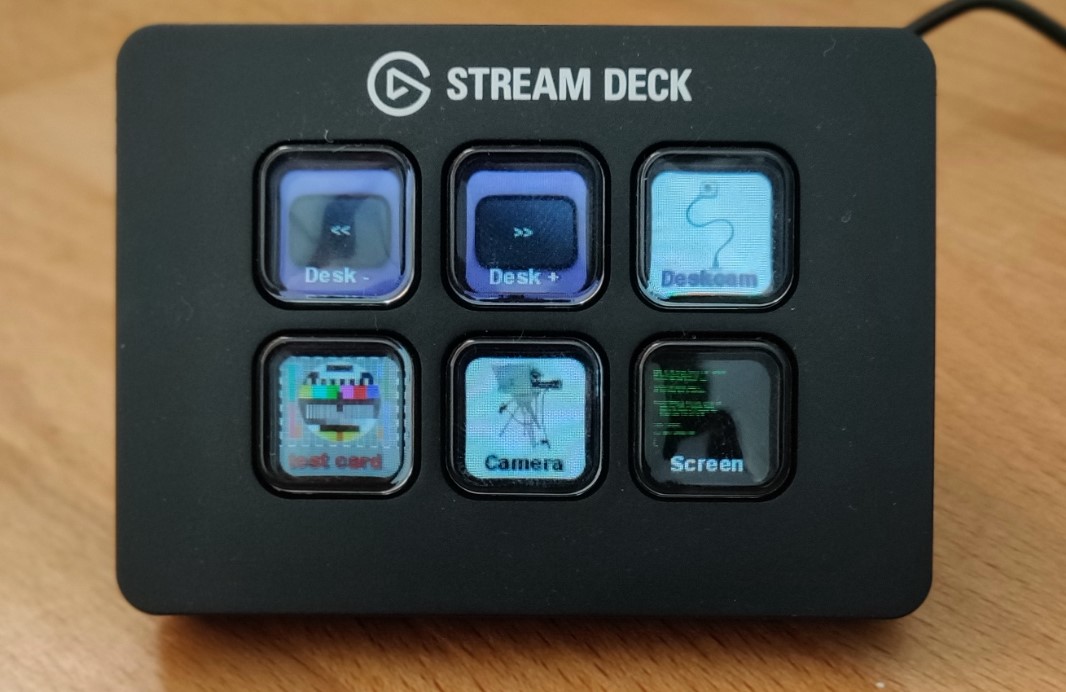
For my setup I choose the base level Stream Deck mini with 6 buttons, and setup buttons as follows:
- Move to previous virtual desktop
- Move to next virtual desktop
- Scene One - Secondary camera
- Scene Two - Test Card
- Scene Three - Full screen camera
- Scene Four - Screen with camera as picture in picture
The software that is bundled with the Stream Deck allows you to define either actions for specific products related to streaming, including OBS, but also many other quite esoteric applications intended for the gamer audience, or to activate keyboard shortcuts (which is how to change virtual desktop). You can customise the image on the button and the text. As well as the bundled icons, you can add your own, although the icon generator application is a web application and is a bit clunky. You can of course add your own images as long as they are 288x288 PNGs. Although it’s fun to get really creative, it’s worth remembering overly complex icons might lead to confusion, and doing the wrong thing. In the photo above I have customised all of the icons (ask me nicely and I’ll add them to a git repo). For a basic setup 6 buttons is enough although with more frequent use I kept finding the need for more buttons. Once again it’s a matter of reaching a good balance between the ease of simple task automation with the potential confusion masses of buttons with complex icons can cause.
There are various other solutions, including a remote control for OBS that can run on a second computer or device, and even a Stream Deck mobile app. Alas, the Stream Deck mobile app is subscription service even if you have bought the Stream Deck hardware, so for me at least the Stream Deck wins for now.
Multiple cameras
In a recent talk I wished to demonstrate a couple of things which didn't really work with the setup I have just described. The first scenario was showing the process of authenticating into Office 365 with a Yubikey. A screen share didn't capture the interaction of plugging in the USB key and logging in to Office.com. The second was to show how DRM protected documents can have restrictions baked into the documents. So effective is the DRM that attempting to screen share a document with restrictions shows a blank area to viewers where the document should be.
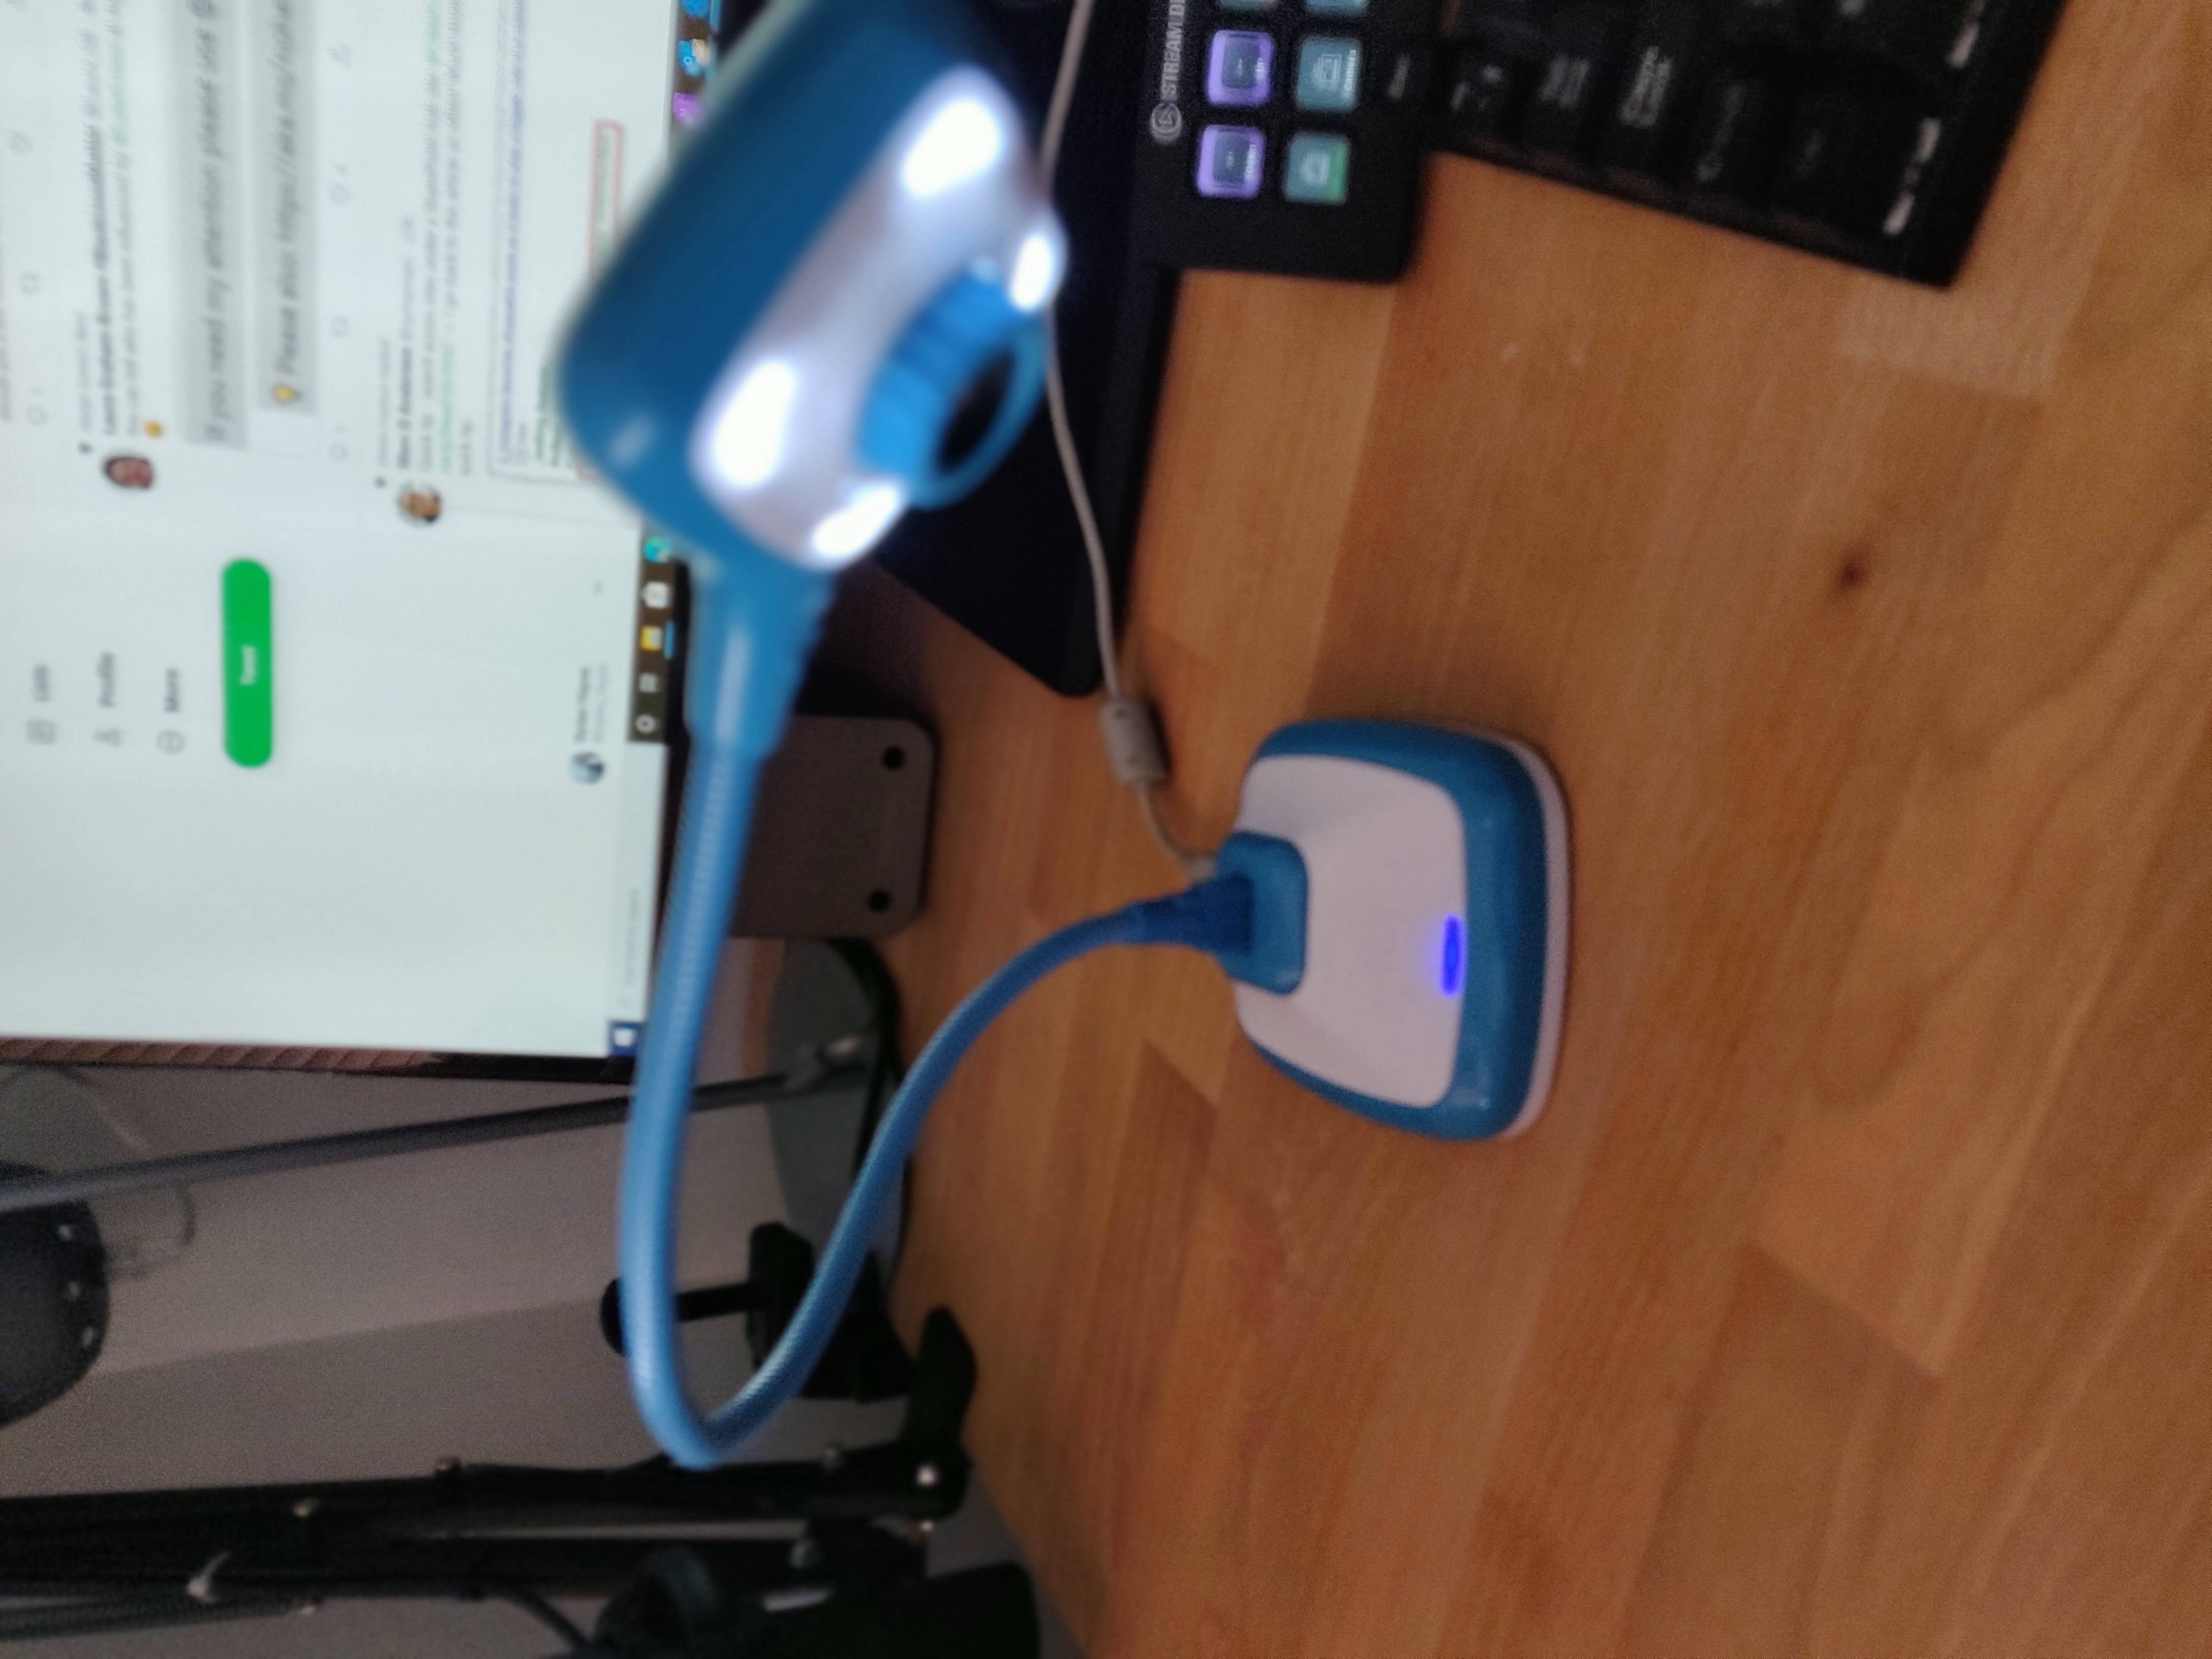
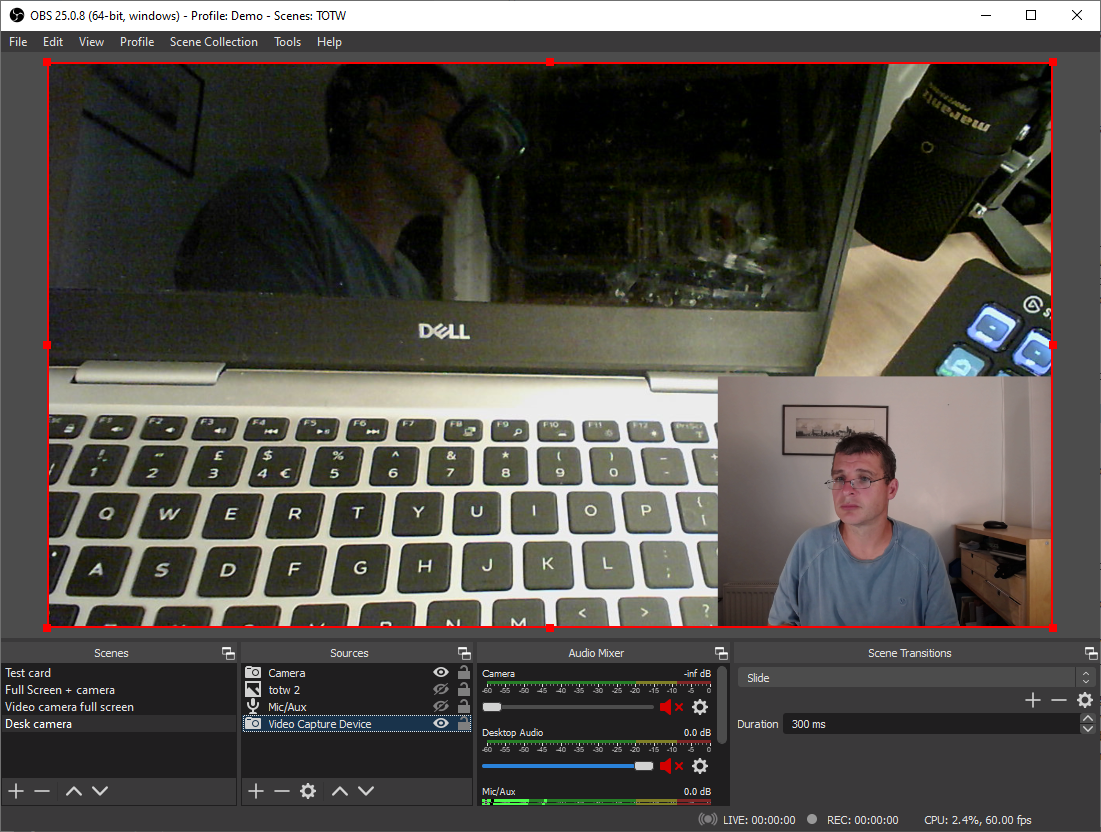
In both cases the solution was to bring in video from an additional camera. Teachers use similar setups to show paper documents in classroom settings. I found that if I setup a Hue HD camera, which has a flexible gooseneck, I could place a laptop on my desk and angle the camera to show the laptop and it's screen to allow me to demonstrate the steps to use a Yubikey and show DRM documents without the pesky DRM doing it's job. Better yet, I could setup an additional scene in OBS which featured the extra camera full screen and my regular camera in a small window in the bottom, so the audience could see me and what I was talking about.
At this point take a moment to appreciate how far this technology has democratised what would have once required a building full of people and equipment: We can now broadcast from a desktop studio built from consumer level products.
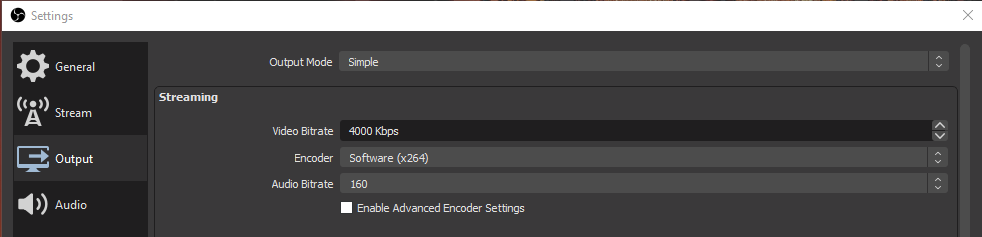
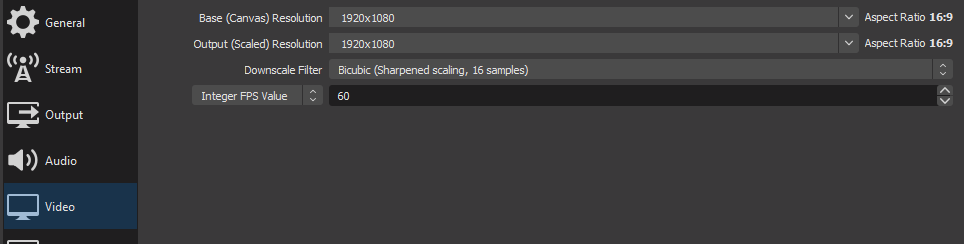
Output settings
Microsoft seem to recommend 1920x1080 pixels at 4000 kbps for Teams live, so I found that going to File -> Settings in OBS and checking the output settings is useful to confirm that your output is correct. Please note, if you are using OBS virtual cam you will need to stop that before you can change settings.
Disadvantages
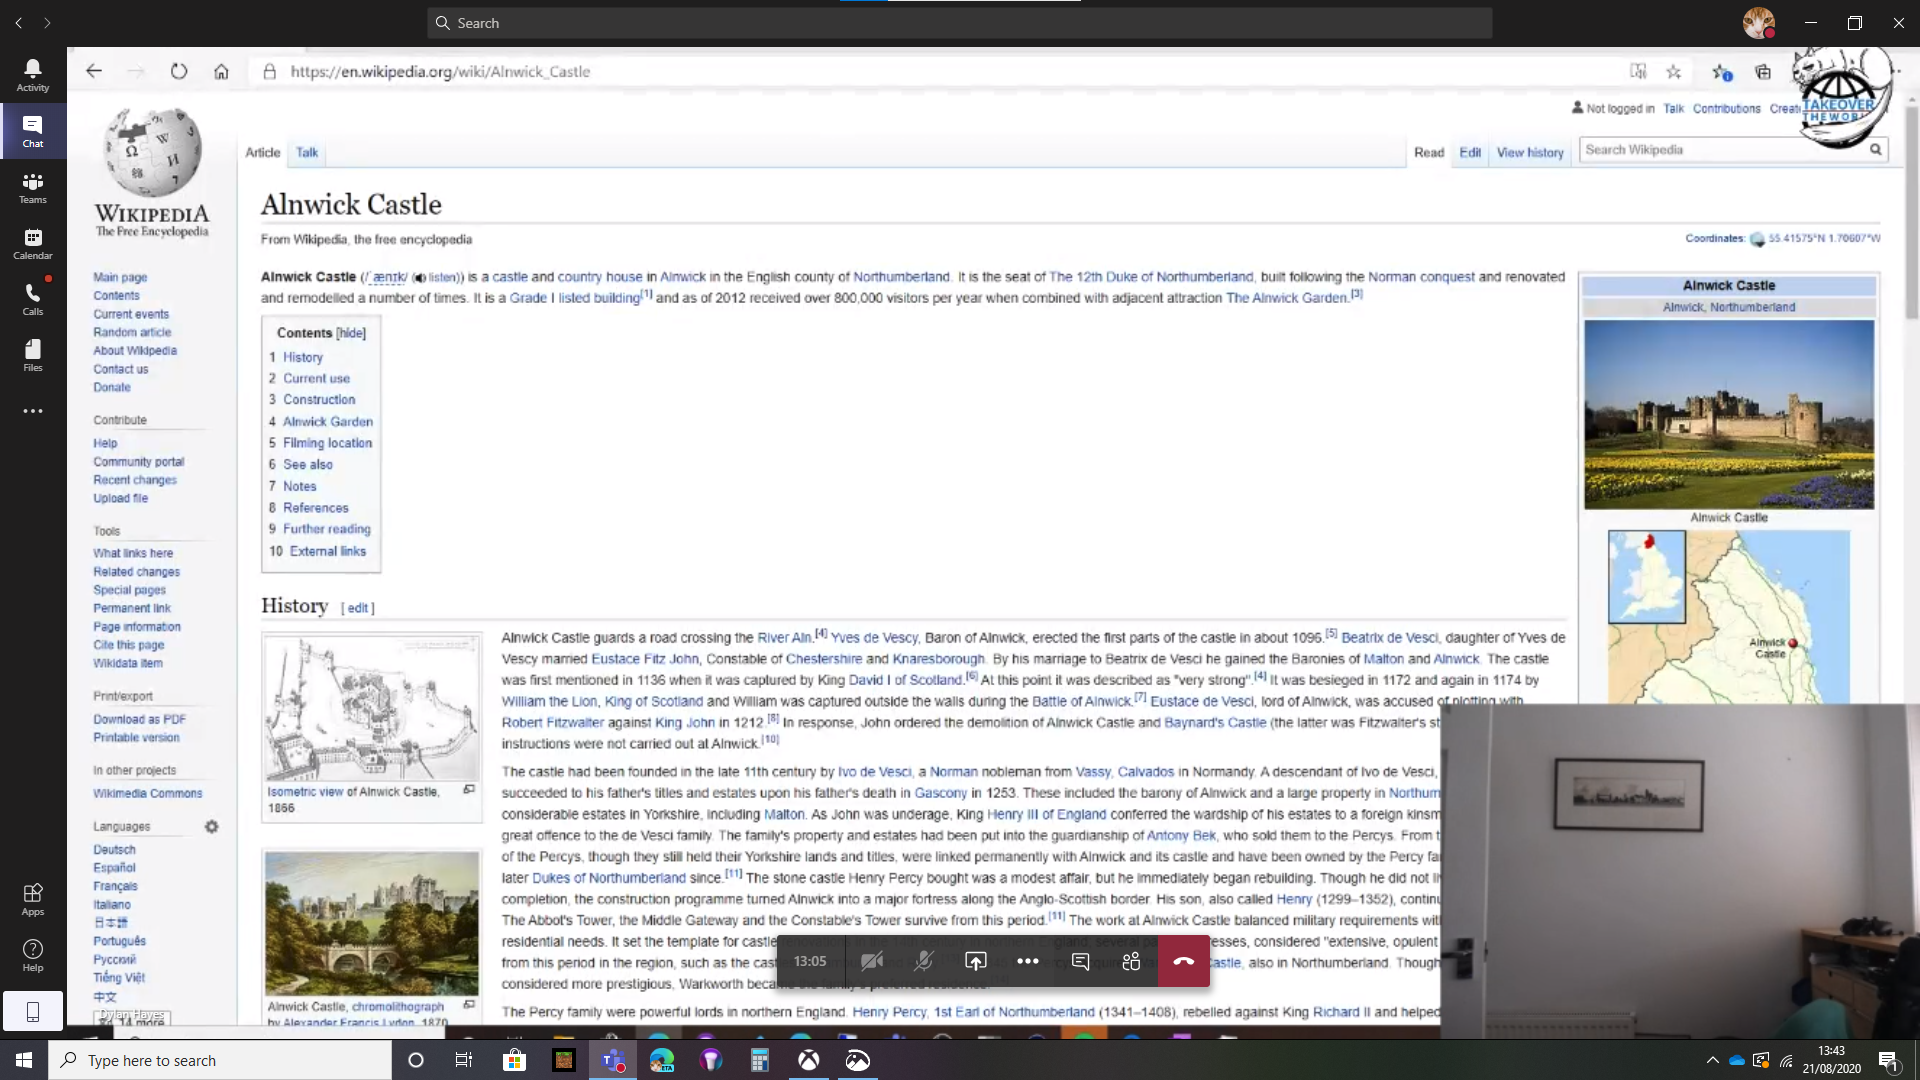
As always, there are some areas for improvement. Even when setup to stream at high resolution such as 1920x1080 and a decent framerate, what appears on the screen of the audience doesn’t look so good. When you share a screen in Teams, it seems to do a much better job of smoothly scaling the output to match the display compared to when you share a screen via OBS virtual camera (Teams uses a different protocol for screen sharing which is optimised for that purpose call VBSS). Of course you can’t control the size of the viewer’s screen of the window size, so the actual results may vary, but my experiments seem to demostrate that Teams scales a screen share better than a camera feed. I have not tested this on other video platforms. Here’s a series of closeup images to show an example - click on each image for the full screen image:
- OBS virtual cam
- Teams Screen share
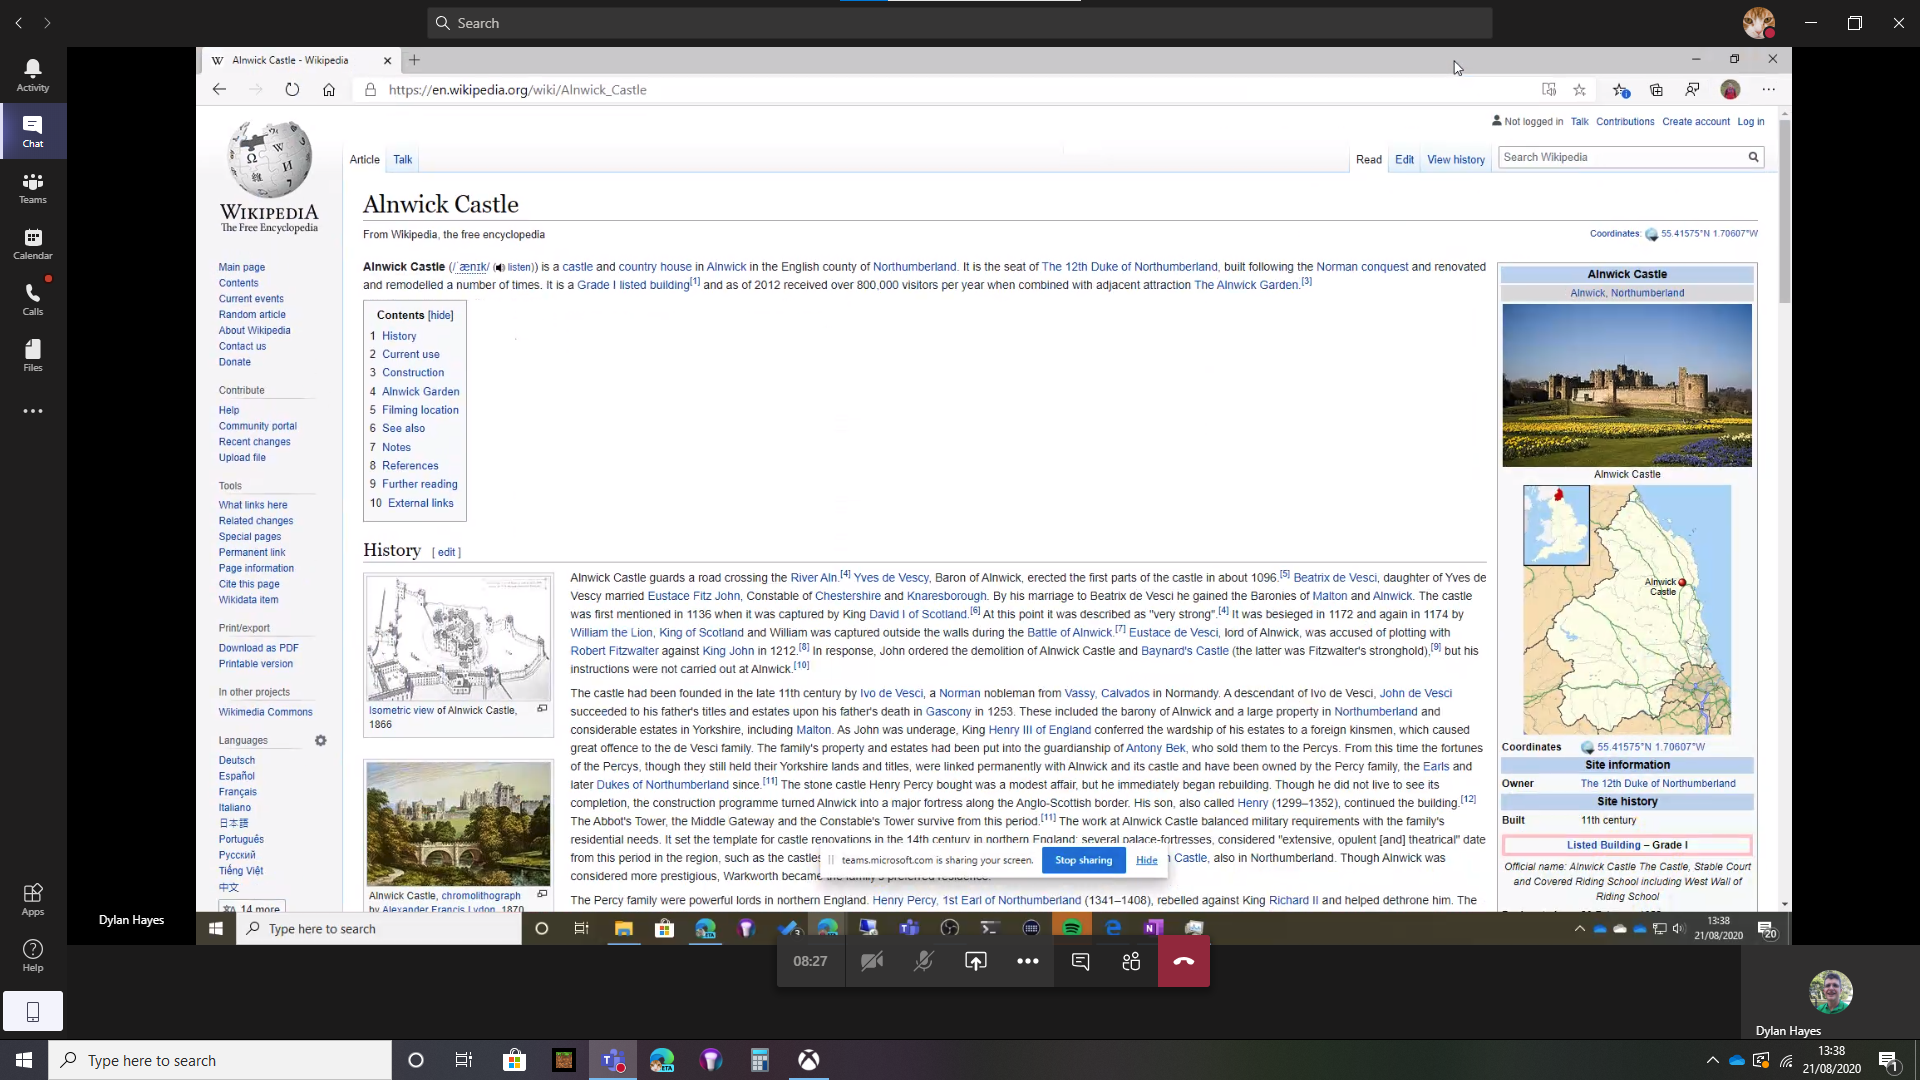
The difference is noticable, and annoying, but not so bad that you would discard this way of working. In general PowerPoint slides and photos look fine, but text heavy screens with small text are noticably harder to read.
Going further
OBS includes a lot of functionality, and it can be extended with plugins to add extra features beyond what is included in the base package. This would be enough to fill multiple blog posts in it's own right. Some of the more notable additional features worthy of further investigation (perhaps a further blog post) would be:
Remote streams using NDI - for instance use a phone as an additional camera, share the screen of another computer, oe bring in the stream from another person for an interview etc.
So it turns out that I had so much to say, that there is a Speaking Virtually Part II where I dwell upon why screen sharing with OBS may not be such a good idea and how to really pimp up your video feed.
Kit list
Hardware
Main camera: Logitech C930-E It's been around for 8 years now, but works well in most lighting conditions. Cheaper alternatives are flooding the market now that everyone has started to realise the limitations of laptop cameras, which is fortunate given the crazy prices these cameras currently reach.
Microphone: Marantz Pro MPM1000U USB microphone Chosen as it was a USB mic with good reviews at an affordable price.
Microphone boom: Cheap generic one from Amazon. In retrospect a more expensive one would have been sturdier and more aesthetically pleasing, although the one I purchased included a shock mount which means less vibration from the desktop should get to the mic.
Secondary Camera: HUE HD document camera Popular in education for putting paper on screen. The camera comes with a flexible gooseneck, so you can position the camera as suits you. I use this for demoing things which can't be shown with a screen share, like demoing DRM on Office documents.
Stream Deck Mini Popular amongst the game streaming community, this allows you to control OBS and the other video production software from a plug in keyboard. There are bigger sizes of these which offer the same thing with even more keys, but for me the smallest one gave enough benefit for the price.
Hue Lighting I have had Hue lights at home for years now, but when I refitted my home office I took the opportunity to place Hue lights either side of my monitors, and a Hue light strip on the ceiling just out of shot on the opposite wall. By setting up the Hue sync software on my PC I can easily control lighting to ensure correct lighting for video.
Software
Open Broadcast Software or OBS is free open source software that allows far greater control of the video output you create. OBS is very much a general purpose tool and unlike other software which is more focused on a particular task such as StreamLabs OBS which is made for streaming games. The interface is not particularly welcoming and assumes you already know what you are trying to do, but making the effort to learn is worthwhile in terms of being able to produce video to a higher standard.
Facebook Live and Teams Live can directly accept the output from OBS, but for most other use cases you will need to convert the output stream into a virtual camera which can them be setup in your conferencing software as your camera. Until very recently, this has required the use of additional software in the shape of OBS Virtual Camera, but the most recent version of OBS (OBS Studio 26 RC1) has this built in.
I’ll update the blog in future with my experiences once I have used the most recent OBS to see how the out of the box virtual camera works.
Hue Sync Although you can control Hue lights with a highly functional mobile app, being able to control the lights from your desktop PC puts everything at your fingertips. By setting up an "entertainment area" in the mobile app, and and running the windows app on my "production screen" I particularly like being able to bright the lighting up to high brightness levels in a single click.
Post script
If you are wondering how long it might to take to set all this up, it took me about 30 minutes to get OBS setup as I liked and all the hardware plugged in and working correctly o a new machine following an unexpected hardware failure on the usual machine I use for OBS. Obviously, I’d done it before and you may find it takes longer.