
Virtually Speaking - Part two
My last blog posting speaking virtually introduced some of tools and equipment that I found could improve public speaking and indeed most forms of presentation over video.
Since then I’ve had the chance to refine the offering based on finding out what works and I learned some neat OBS tricks along the way.
As I mentioned before, game streaming is huge, and there are people out there making a living from presenting themselves playing video games live, so the chances are that somebody has already figured out how to something.
My first point, and I’m reluctant to say it, is that no matter how I tried, the quality of sharing a screen via OBS and a virtual camera was never as good as the native screen sharing in Teams or Zoom.
Caring about Sharing
No matter how much I pushed up the bitrate, the output would never look as good as what you got if you shared the screen natively from a video conferencing application regardless of if it was Teams, Zoom or Facebook live. The output from OBS looked fine in the preview window, but what you’d see in Teams was never as sharp as it had compression artifacts and just looked fuzzy. I would suspect that Team does something to optimise the compression for a display rather than camera output. I saw much the same results when trying this with Facebook live. With a PowerPoint containing big and bold text, and lots of graphics your audience would probably not notice the difference, but with small text, and heaven forbid a terminal window it wasn’t good at all. Given that, my recommendation is that you should use the native screen sharing if you intend to show anything more complex than a PowerPoint. Using Virtual Desktops to switch between PowerPoint and demos is still a great way to do things, but this can be done by sharing a screen, rather than OBS and Virtual Cameras. .
Once we’ve cleared this up, let’s look in more detail about some tricks in OBS:
Some shameless self promotion
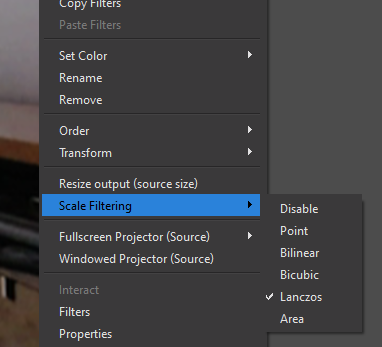
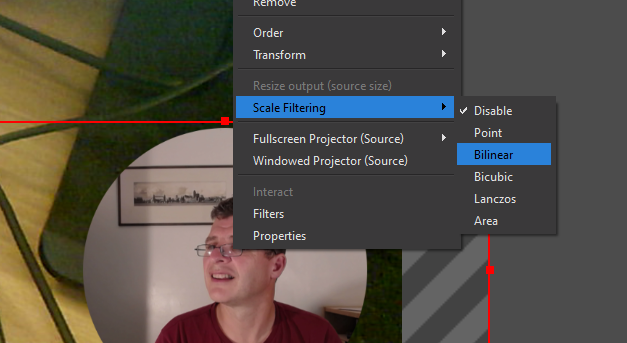
As mentioned previously sticking a logo in the corner of the feed is a nice touch. Likewise putting a twitter handle or some other promotional message on the screen is nice way to standout. I’ve found there are a few things to optimise this. Adding an image is easy. In the sources area add an image. You can drag item into a scene and resize the image to suit your needs. But by default these are scaled but no scaling filters are applied. If you right click on the item, and then select Scale Filters you can select different filters. By looking at a preview of the output you can see how the item renders.
Some experimentation will find the filter that works best for you logo. The same applies to any other elements you are bringing in; there’s no substitutes for trying different filters and sizes to see what looks best for you.
Position is important as well. You don’t want to lose too much of the screen by putting your extra items front and centre, but if you stray too close to the edge of the screen, you may find that when people resize the video window the logo gets truncated, so it’s worth keeping a margin between the logo and the edge.
Even more shameless self promotion
As mention before a twitter handle or some other text is a nice way to add a bit more personalisation to your video output. Getting started is simple. Just go to sources, add text, and choose and font and something to say. There’s a few tricks you can do to ensure it works well. You’ll be sure to want to give it a generous margin from the edge of the screen, but it looks kind of dumb sitting there, and can be hard to read depending on what background it’s set against.
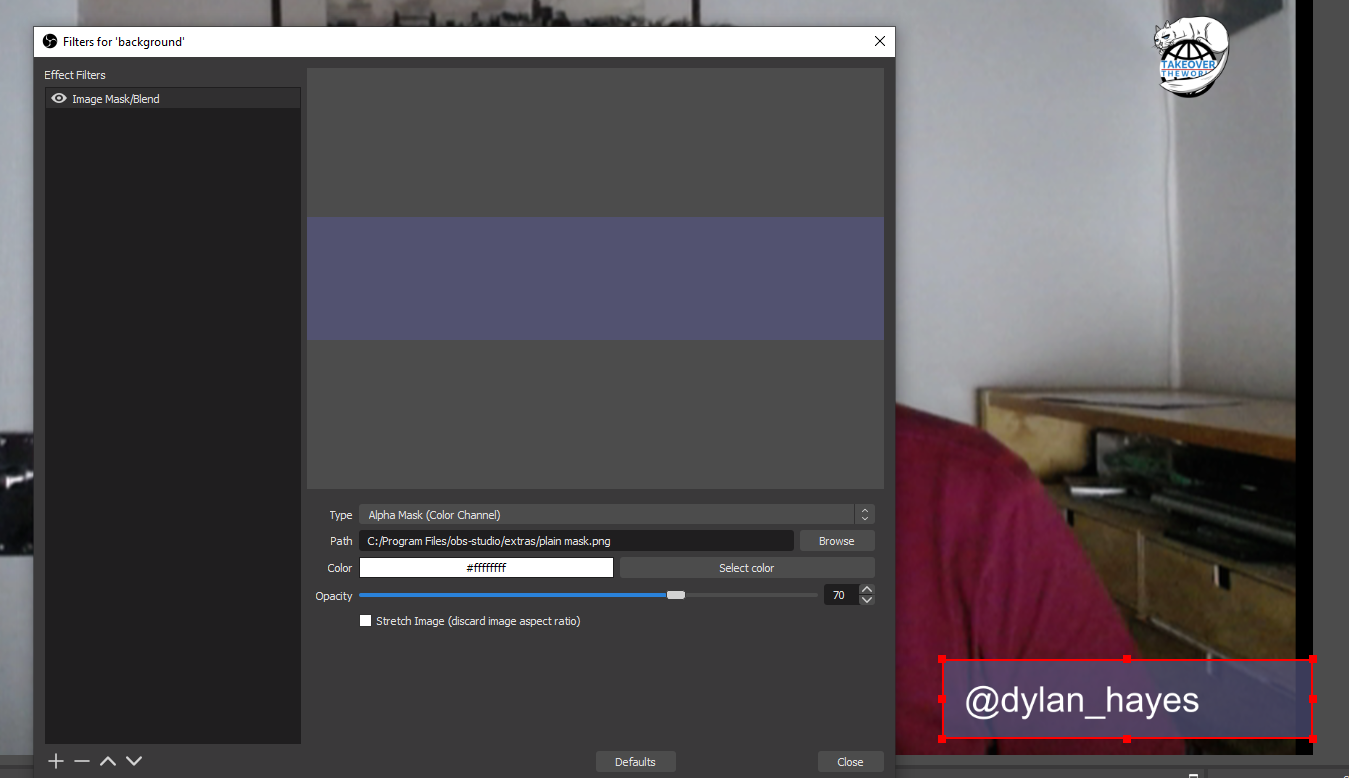
By adding a ‘Color Source’ to the scene you can create a swatch of a certain colour. By choosing a colour that matches your branding, and carefully positioning and sizing it, you can park the coloured bar under your message. You will have use the properties for the source, and the ensure the item in above the background and below the text to get this right. I like to extend the colour bar from the text to the edge of the screen, so the text no longer looks like it’s floating in space.
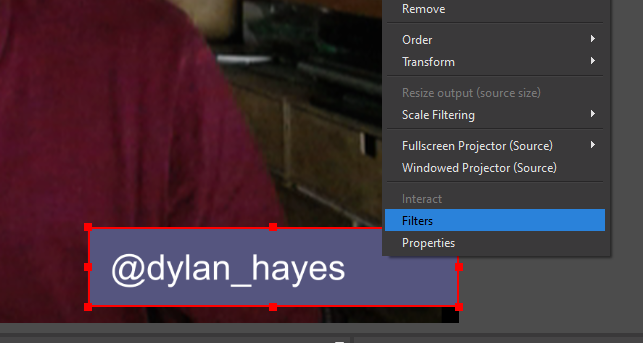
Next, we’re going to make this coloured area partially transparent. First you’ll need to create a one pixel PNG image with a non transparent fill. Then select your colour bar and hit ‘filter’. Go to add filters and choose the Image Mask/Blend, and then choose the one pixel image as the path. The just play with the opacity slider until you get the right effect.
Wearing a Mask
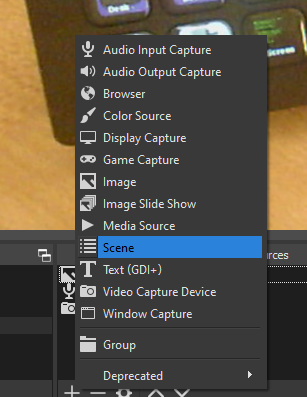
My stupid party trick is to run two cameras (or to have a screen shared with a camera in the corner if the content allows). Having a rectangular camera window is just so square. How about a different shape? It took me a while to figure this out, as if I applied a filter to the camera it would apply to the camera source in all scenes and it looked dumb full screen. The missing ingredient was to create a special scene, let’s call it ‘Video Camera Full Screen Dummy’. We don’t actually want to use that scene directly as an output, but include it instead of a camera source as OBS allows you to add a scene to a scene. Let’s step through this in more detail.

First we need to make a scene, and then we apply a filter to the whole scene. You must do this to the entire scene. The filter we need is an Image Mask/Blend. The image we need is an alpha channel mask. Fortunatly, a search for OBS webcam overlay mask yields plenty of ready made ones.
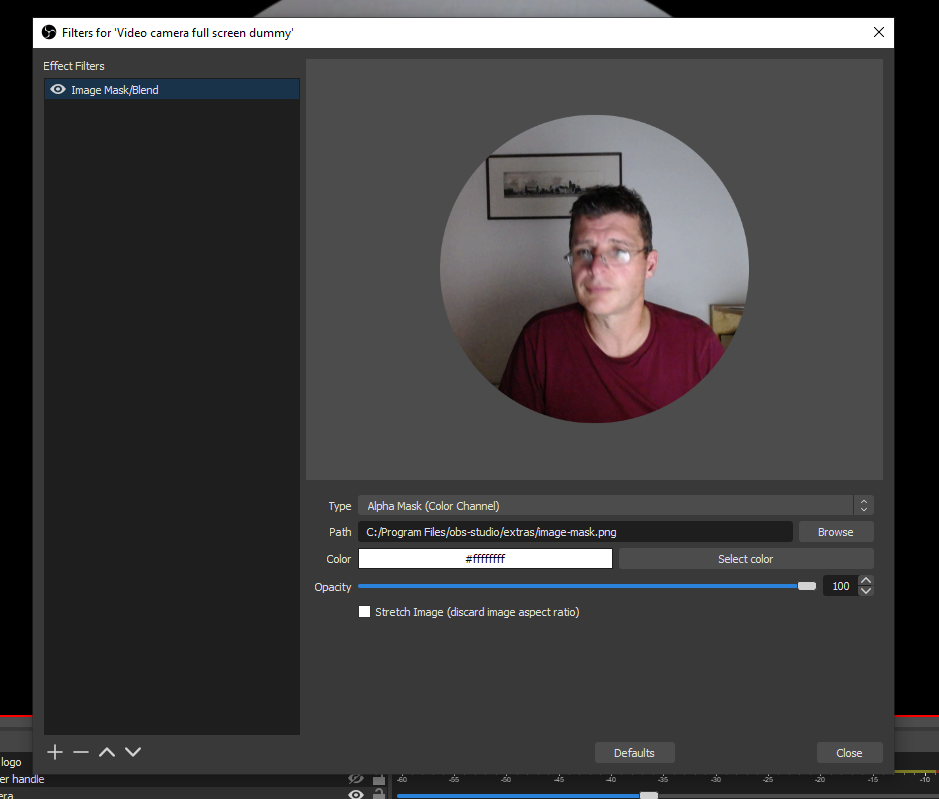
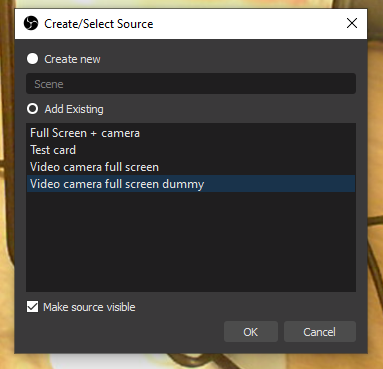
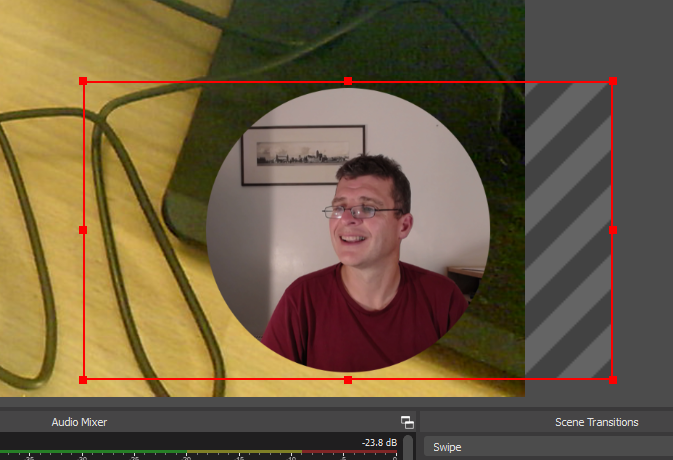
Simply apply the mask, the whole scene is inside a neat round mask. Next, we find a scene that you wish to add some round web cam pizzazz to. First, you need to delete the old boring non round web cam object from the scene if there is one. Then add the scene as a source.
 After that, just drag and size the image to where you want it, and you’ll be the envy of your whole neighbourhood.

And lastly, you may want to play with the scale filtering we talked about at the start to get the camera looking nice.
Tweak away
We’ve talked about some of the things you can do with OBS, but there’s a wealth more stuff, as we’ve hardly scratched the surface. OBS hasn’t got particularly approachable documentation, but there are a lot of blog posts aimed at giving streamers ever more fanciful effects. It is worth remembering that all this stuff should serve a clear purpose, and unless wish to look like your own 24 news channel, with text and graphics spewing everywhere these techniques should be used sparingly and either add something of value to the viewer, or help your message.